Cisco Meraki Native RadSec Conversion Guide
Prerequisites
- Meraki system must be running 14.0 or later.
- Guide assumes the network is using an on-prem Meraki MX Controller.
- Meraki system has AP(s) linked to the MX Controller.
- Meraki system has basic traffic routing working with existing SSID(s).
- Must have the Meraki specific certificate used for the Helium Plus Meraki onboarding process.
High Level Steps
- Build Meraki Helium Passpoint SSID
- Import Helium CA certificate and export Meraki CA certificate to Helium team
- Build a new SSID
- Configure SSID to use RADIUS
- Build Hotspot 2.0 Profile
Import and Export CA certificates
-
Login to your Meraki Dashboard in your browser
-
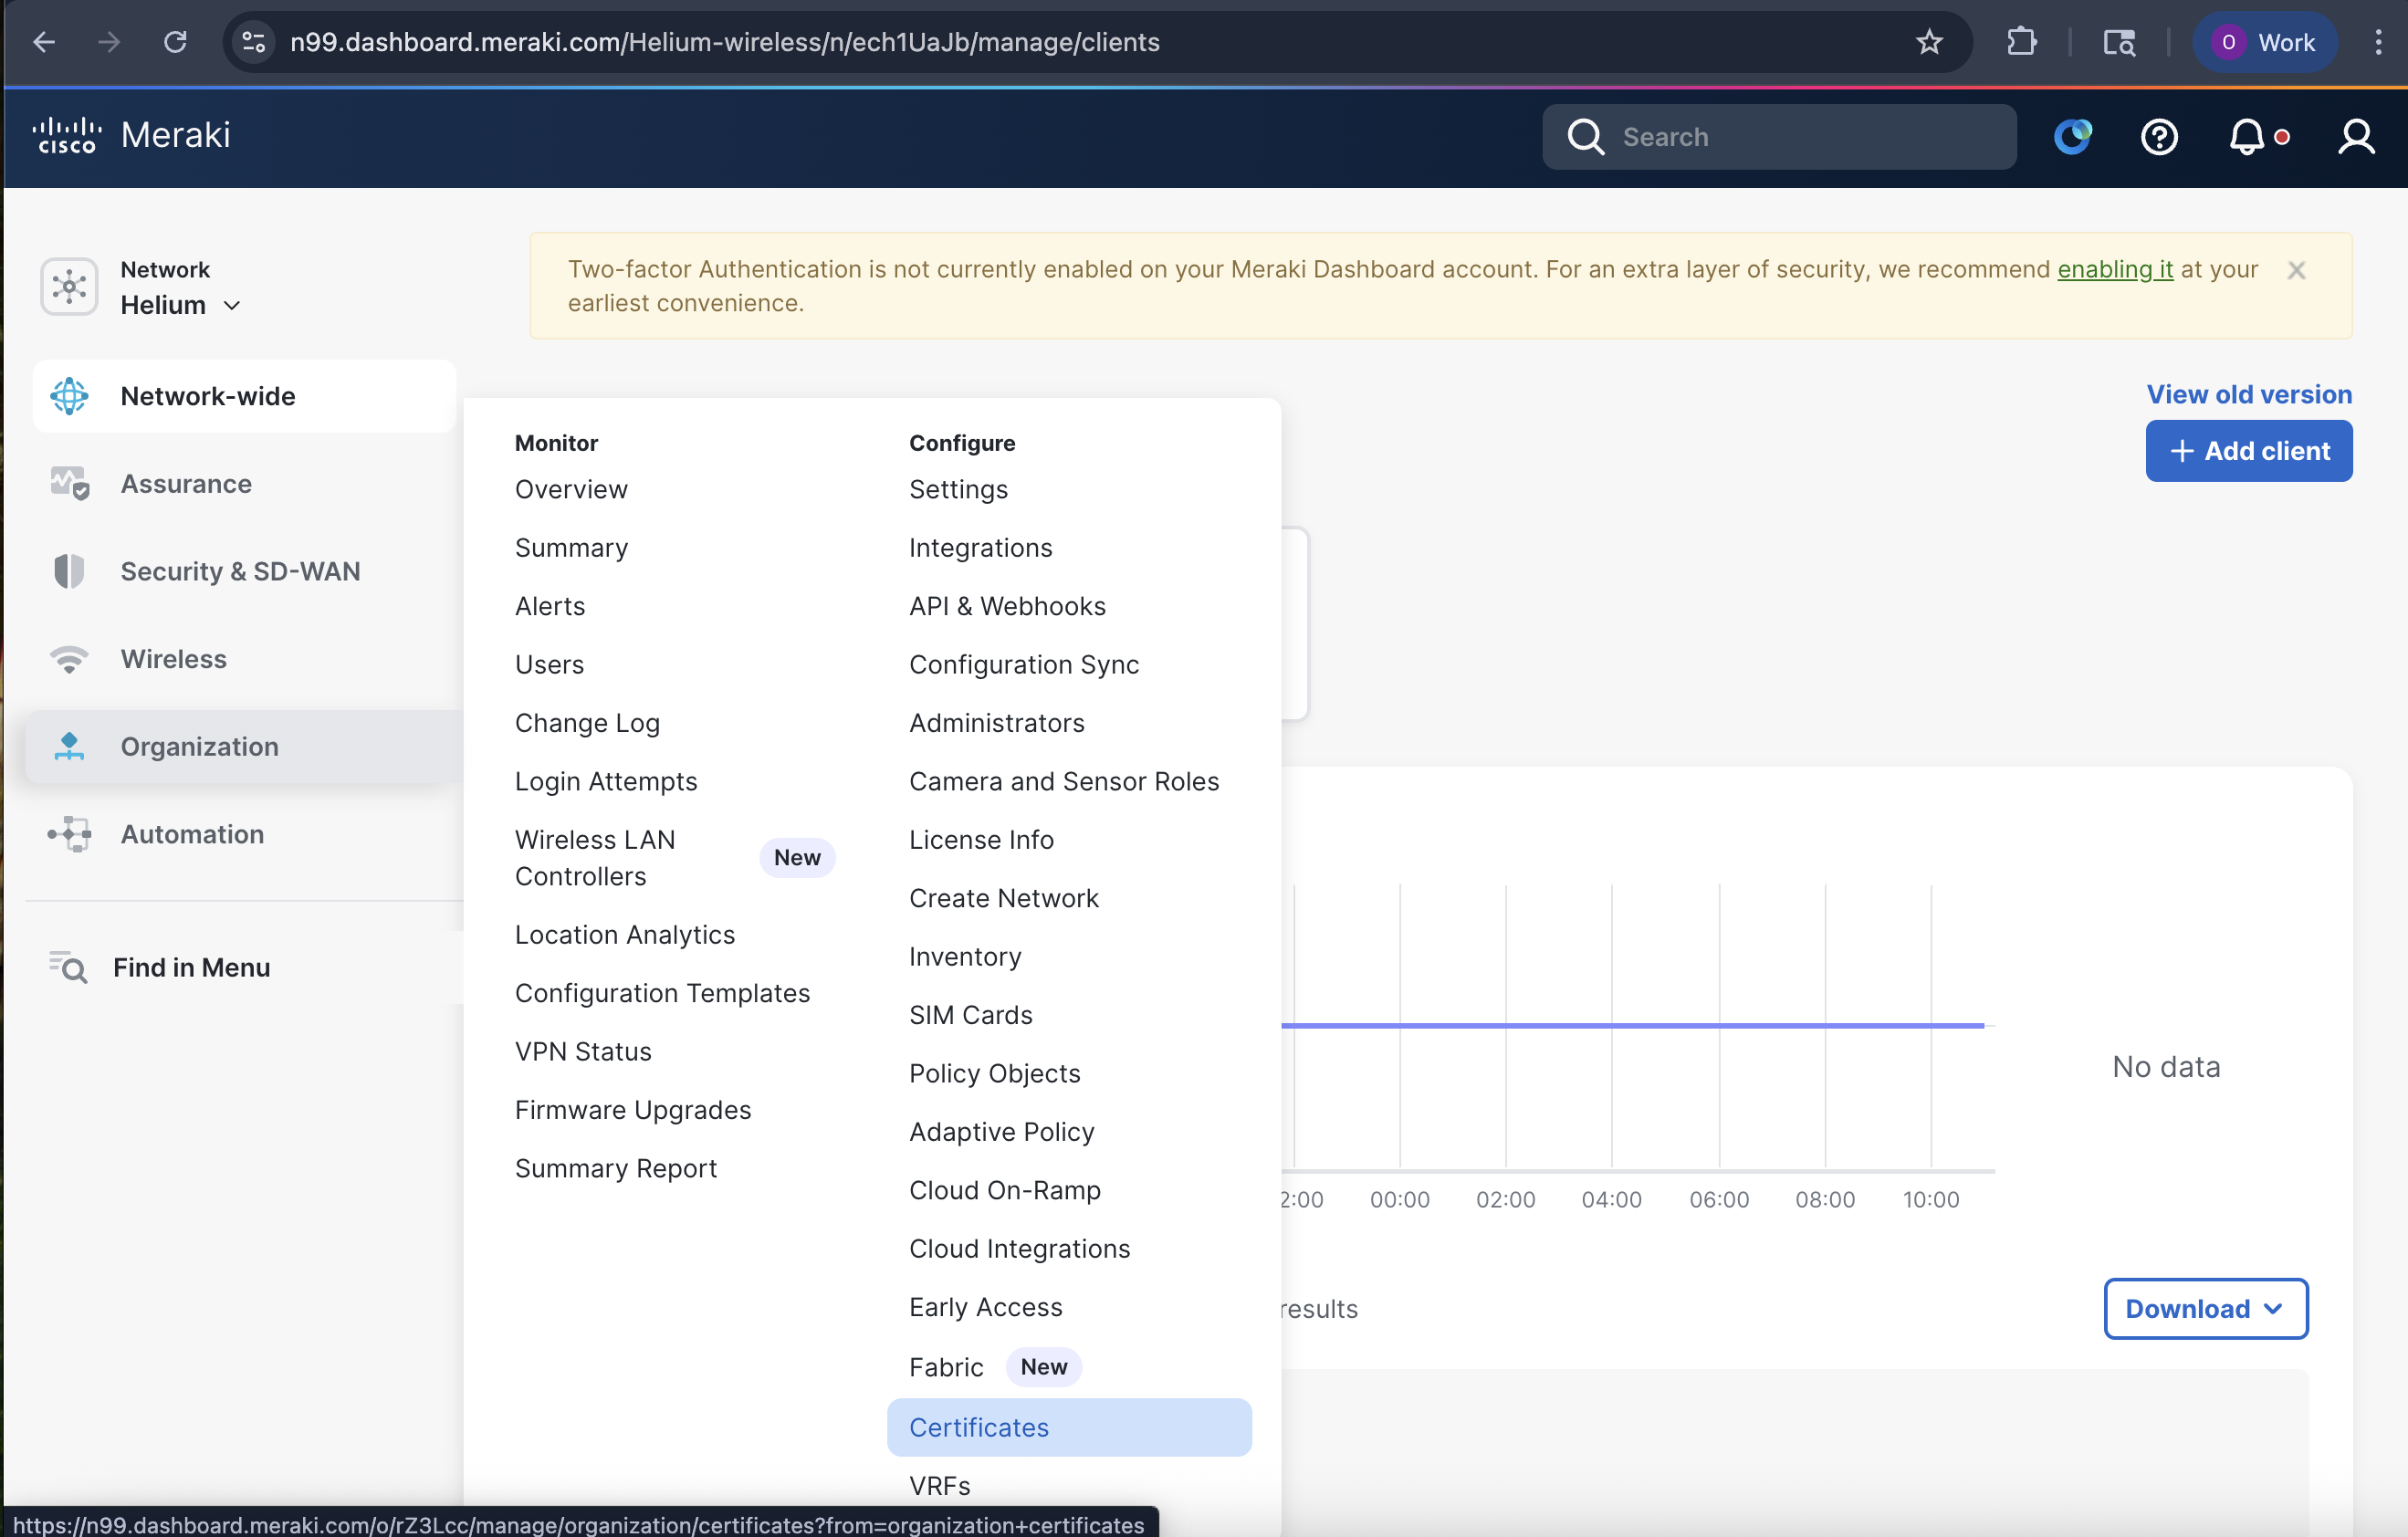
Click on Organizations in the left menu column
-
Click on Certificates
-
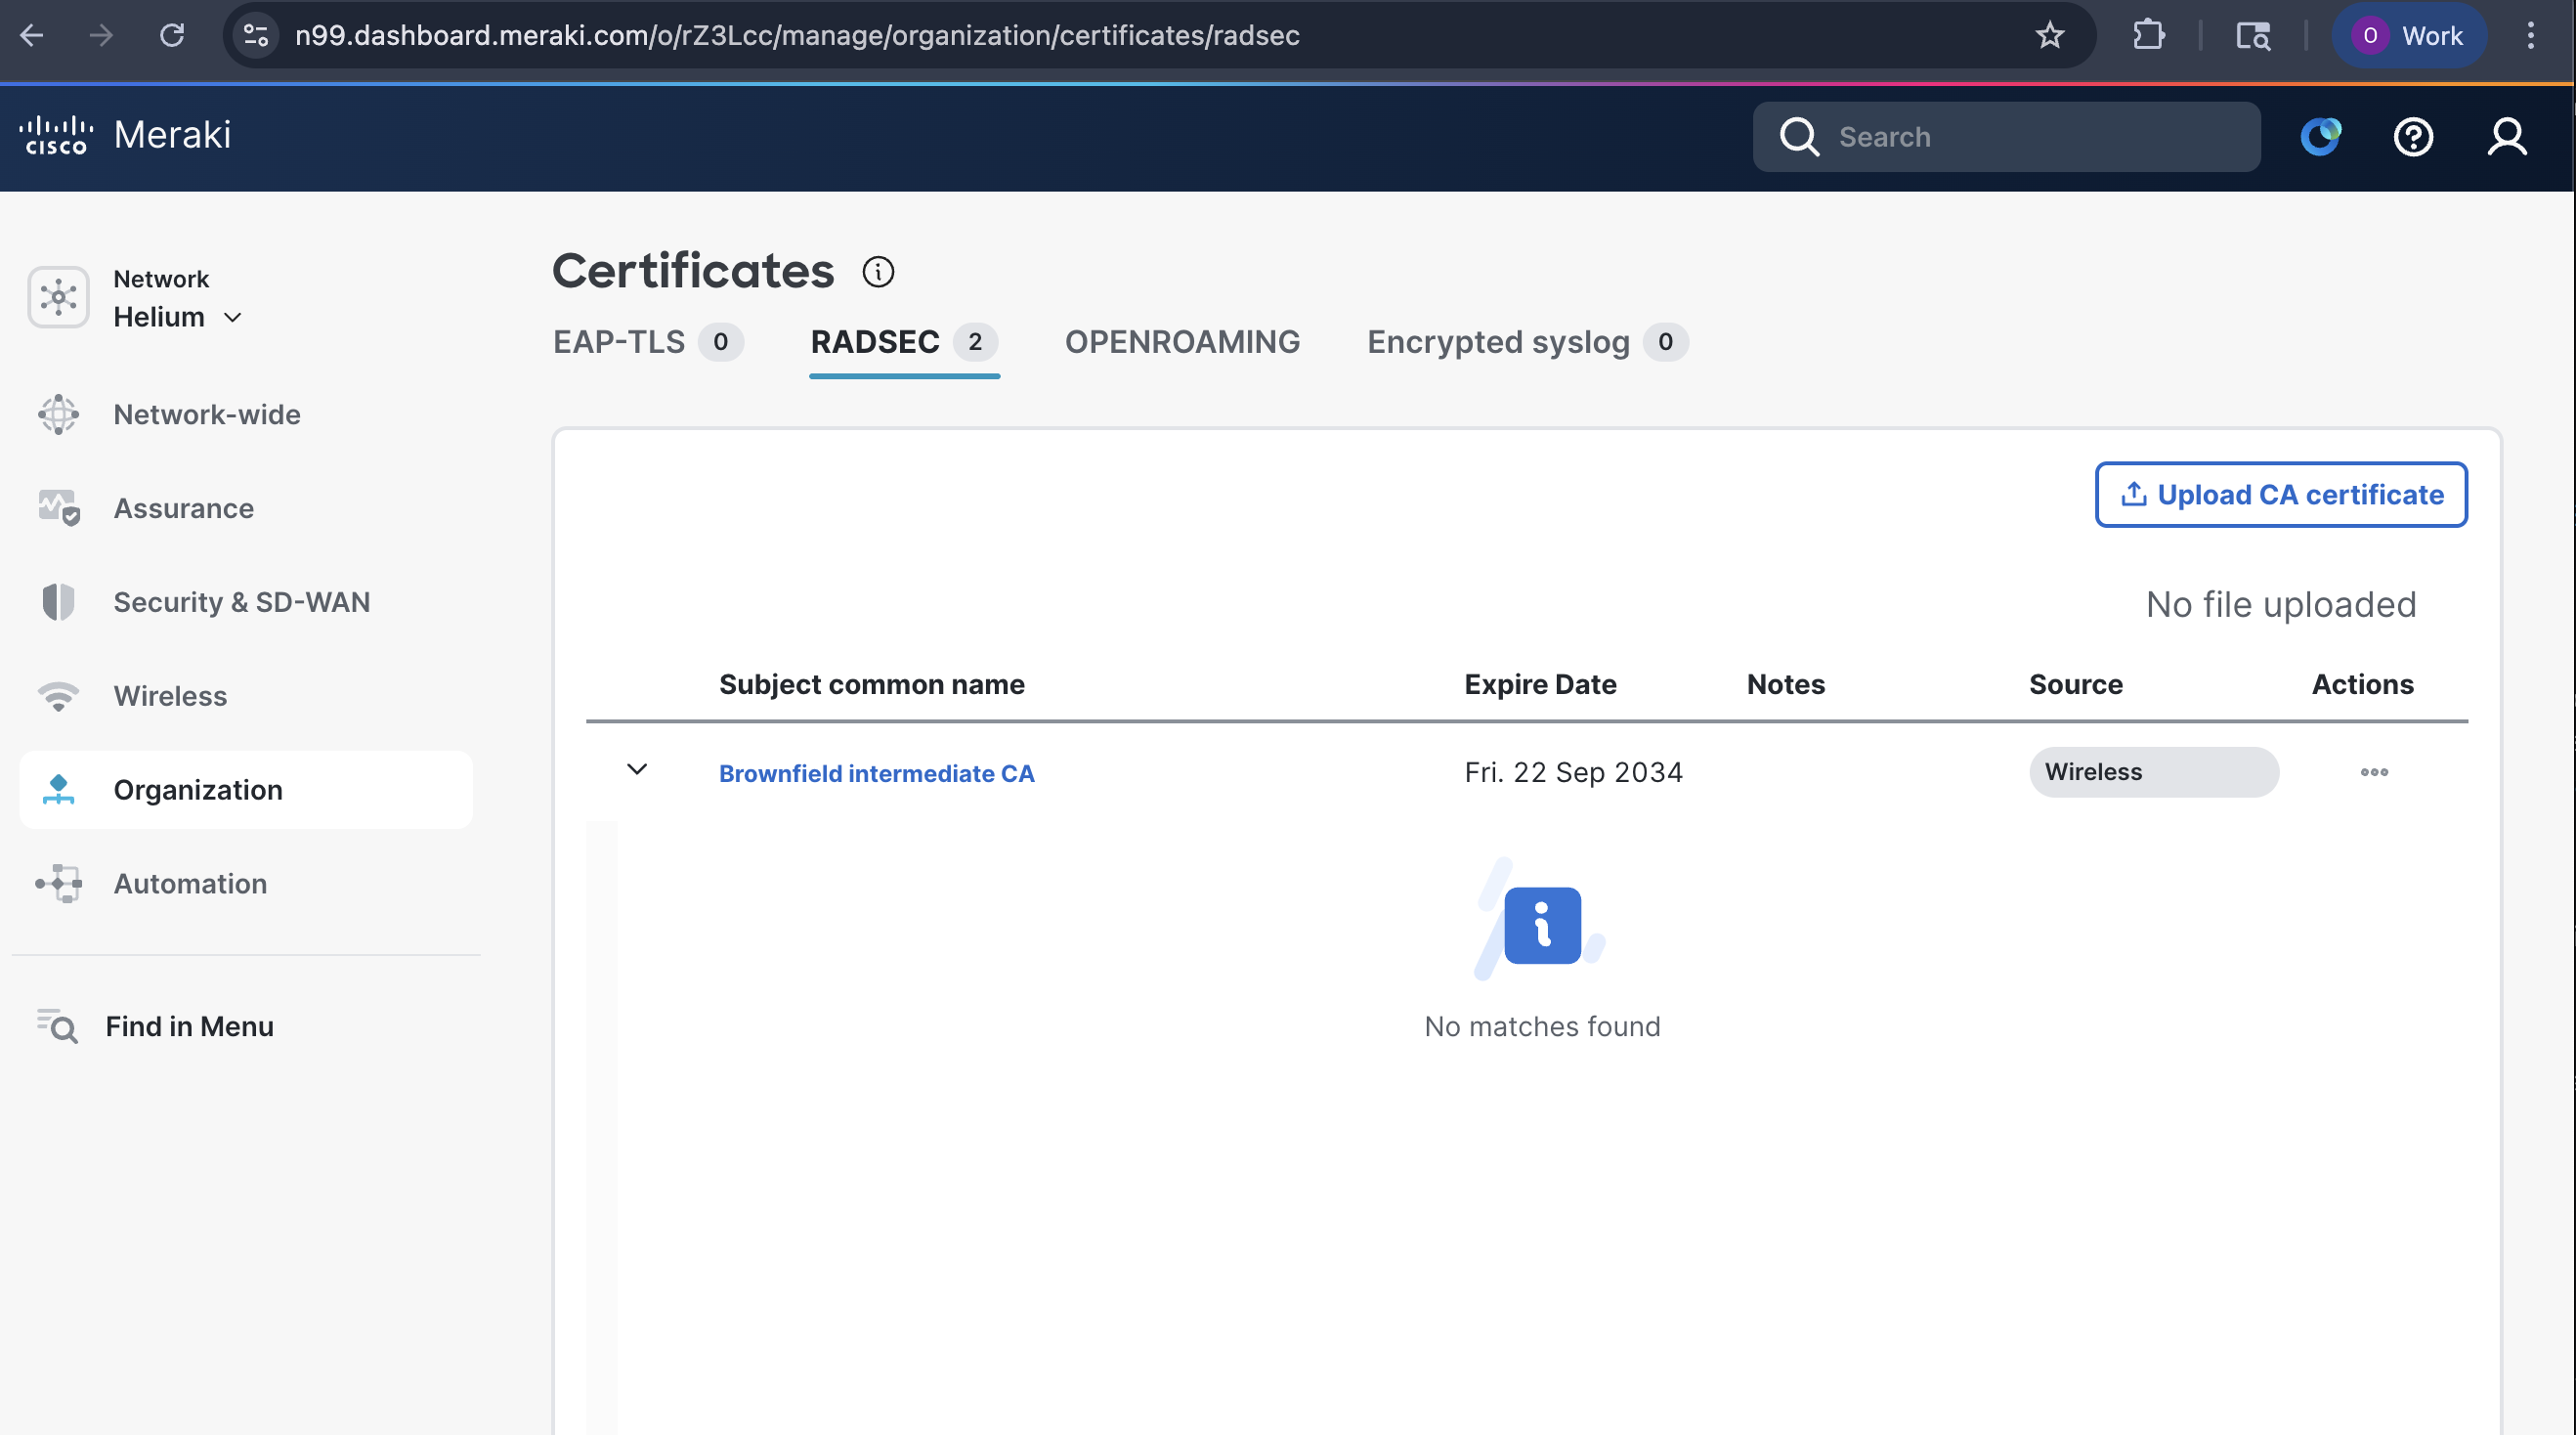
Select the RADSEC tab
-
Click on Upload CA certificate and upload the Helium CA certificate file sent to you by Helium team
-
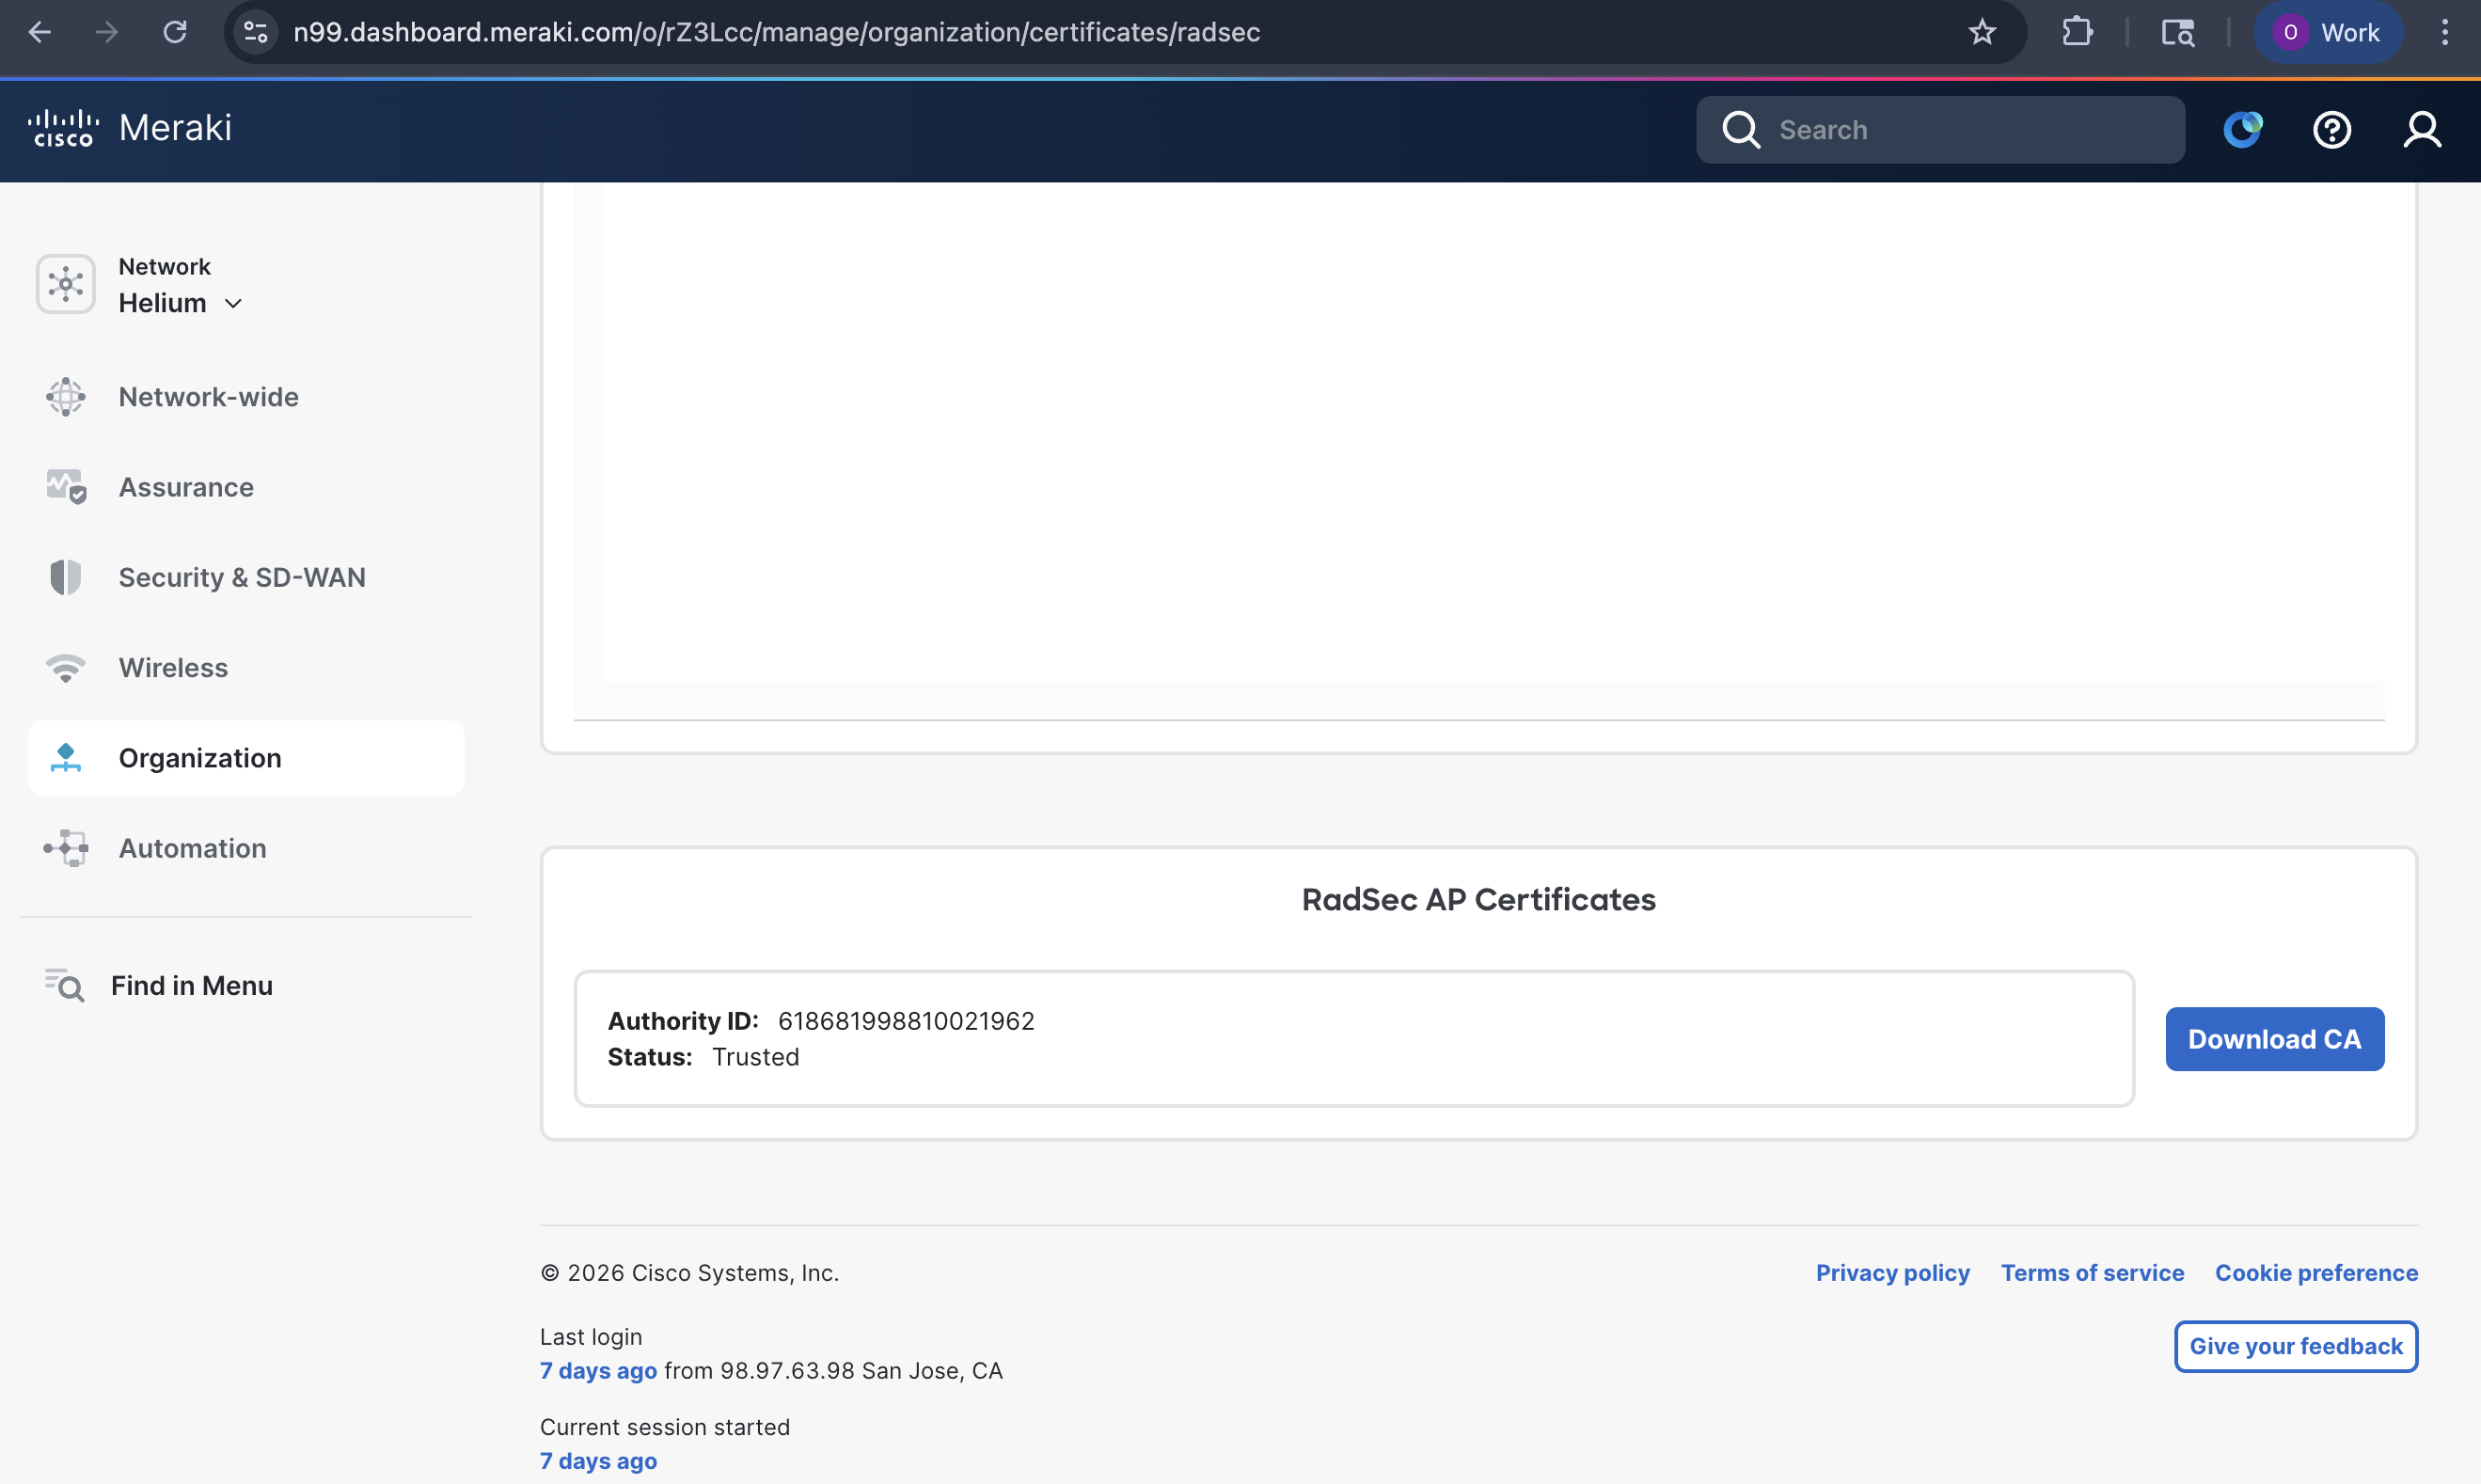
Scroll down to RadSec AP Certificates and click Download CA and Trust CA
-
Send the downloaded CA certificate to the Helium team
Build Meraki Helium Passpoint SSID
The following steps will configure your Meraki system to broadcast an SSID with the needed Passpoint and RADIUS configurations to support Helium Mobile user offload.
Build a new SSID
- Click on Wireless and then SSID in the left menu column

- Look for an “Unconfigured SSID X”
- Click on rename
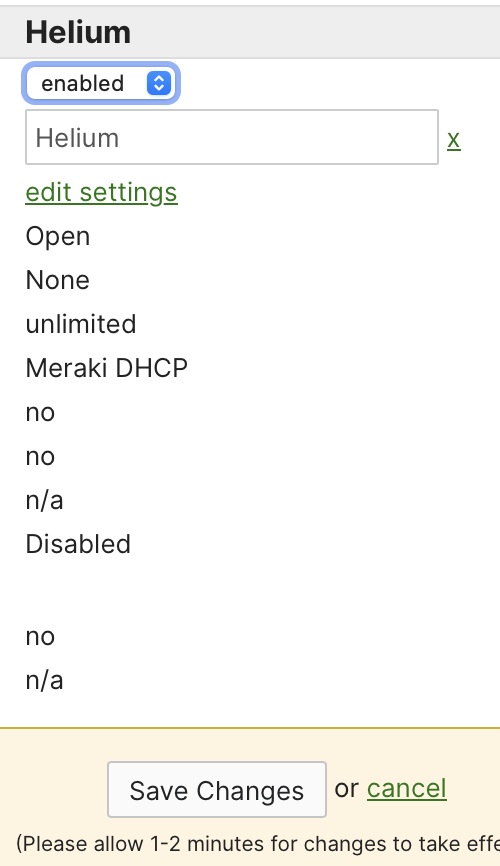
- Enter “Helium”
- Select Enabled
- Click Save Changes
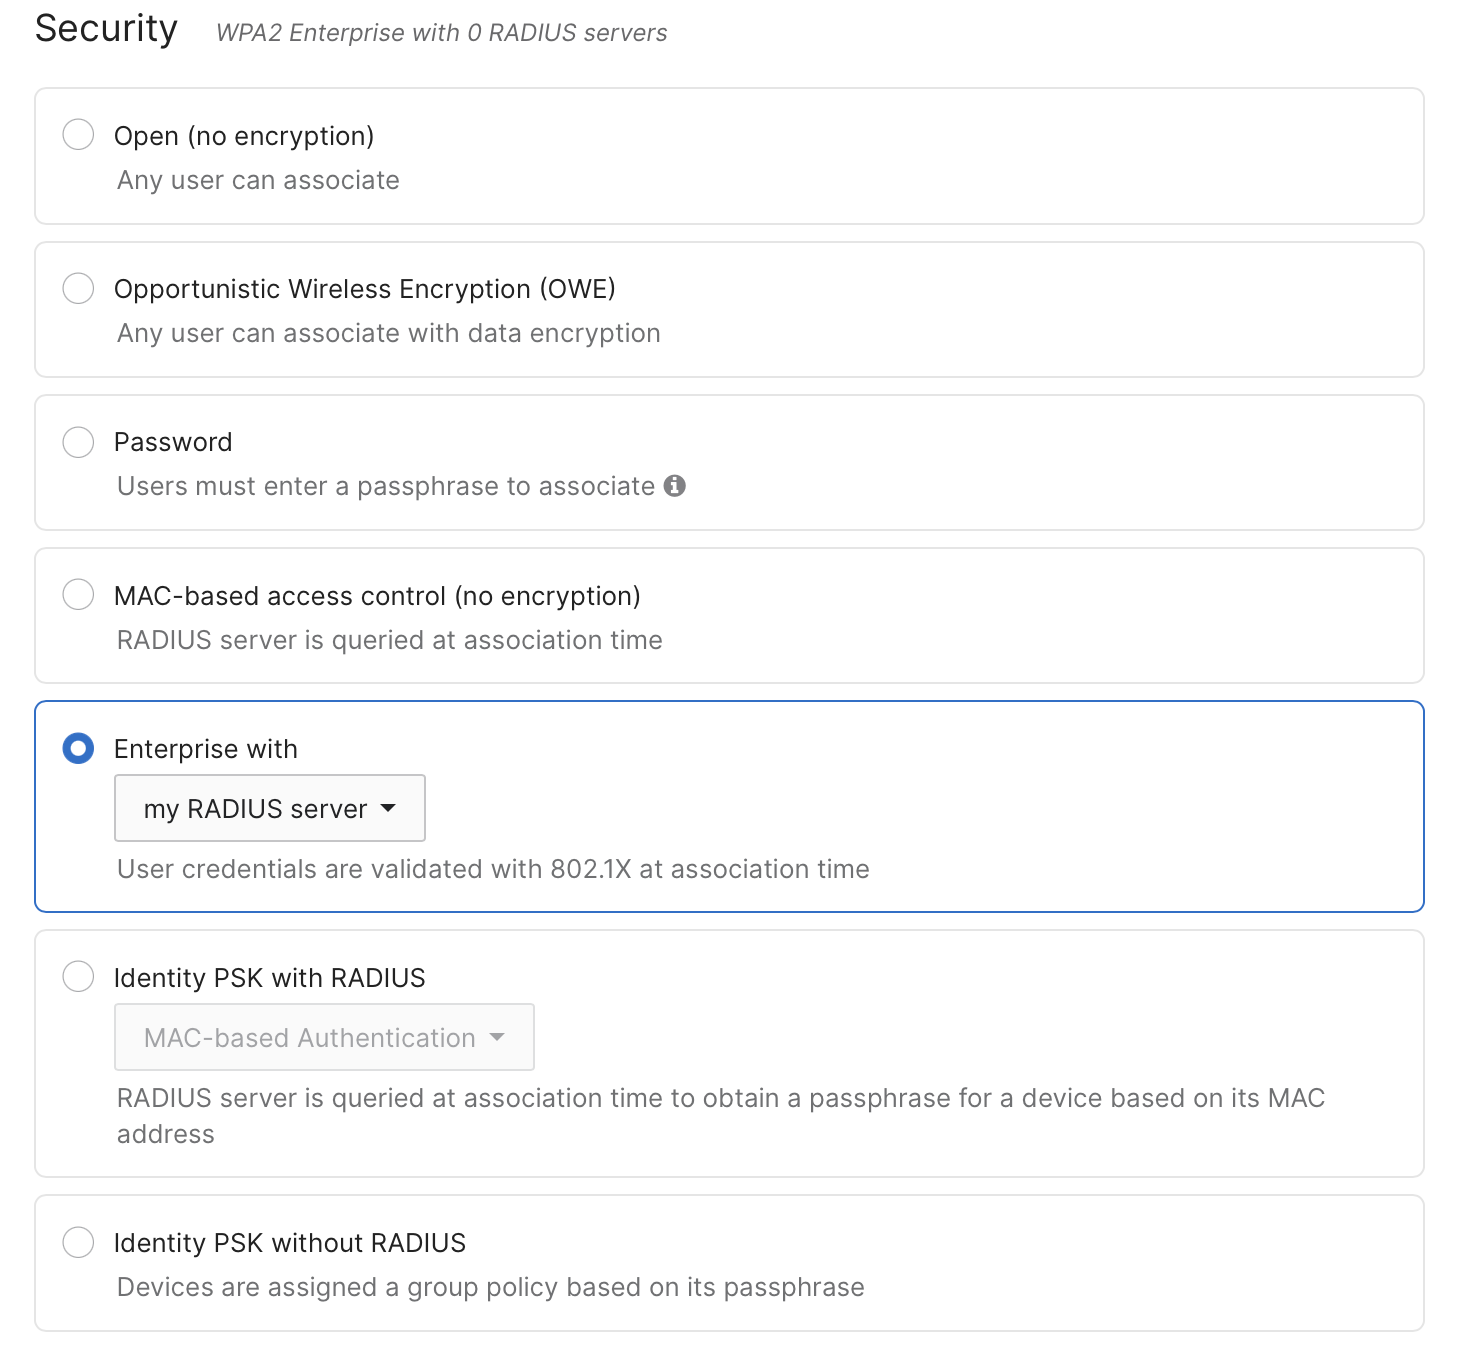
Configure Helium SSID for RADIUS Access Control
-
Click Edit Settings
-
Under Security heading toggle the circle Enterprise with
-
Select my RADIUS Server
-
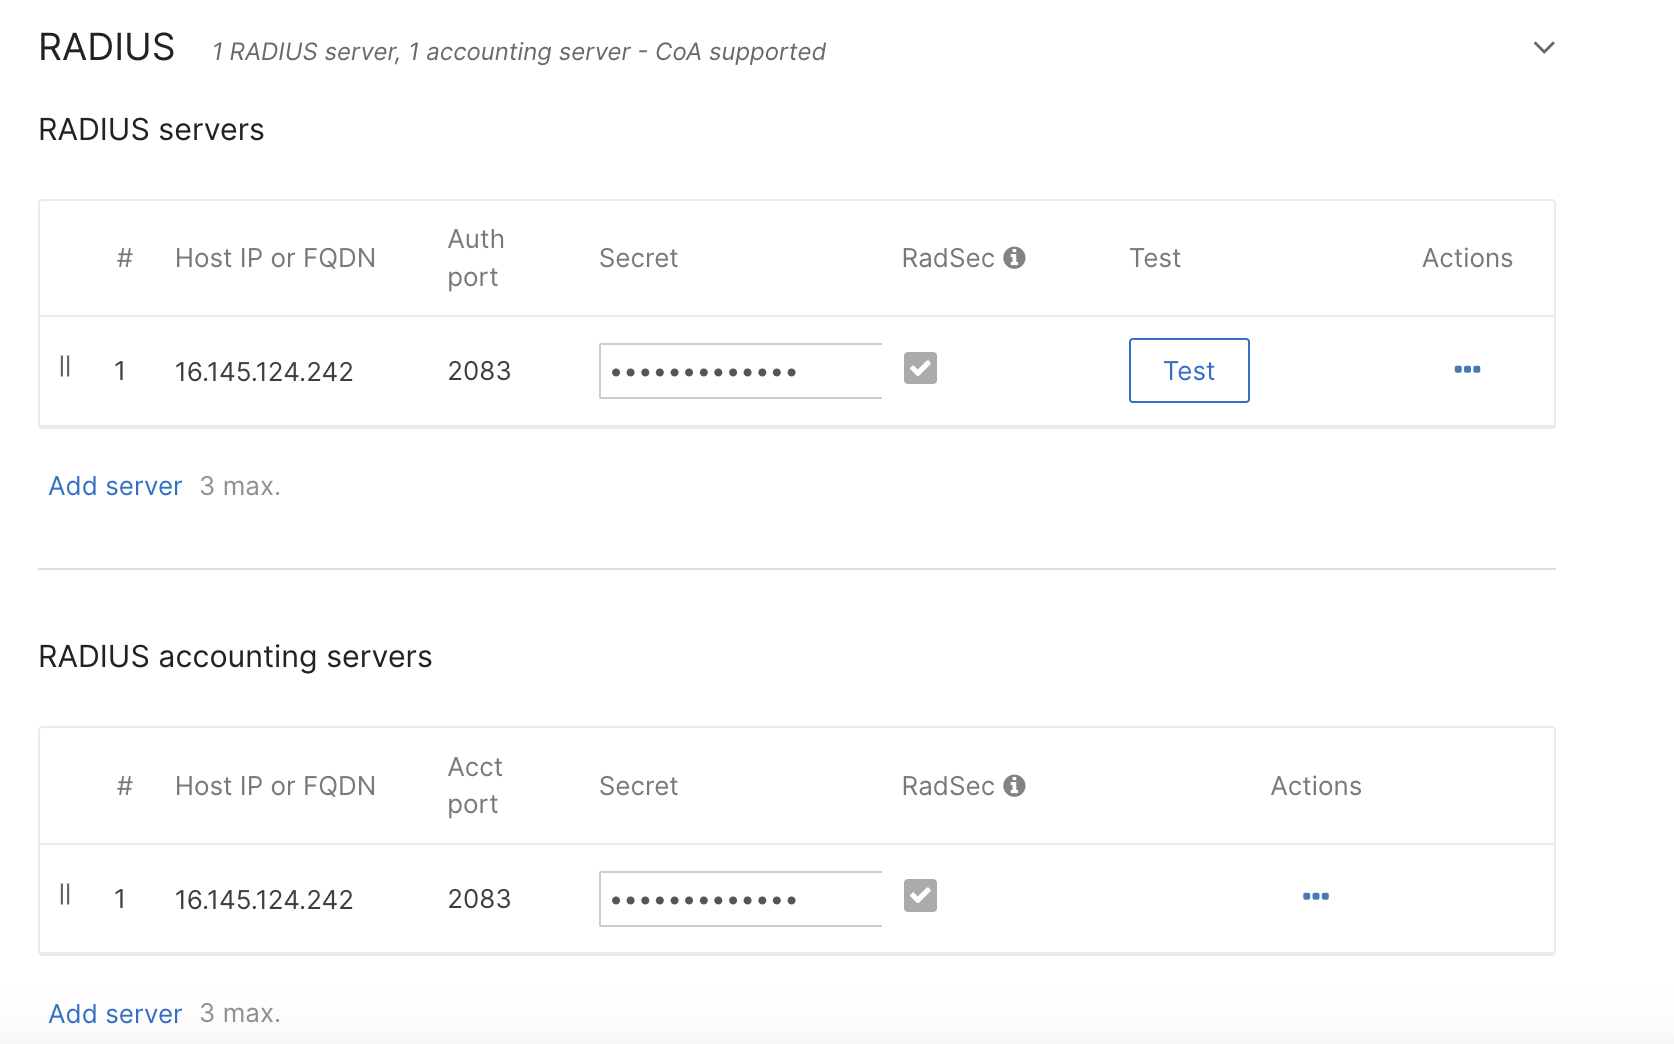
Scroll down to RADIUS and click the arrow on the right to expand
-
Click add server and add the following configurations
- Enter IP Address: 16.145.124.242 Port: 2083 Secret: radsec. Click Done.
-
Repeat those steps to add the same server to the RADIUS Accounting Servers list using port 2083.
-
Select the check box next to Radius CoA Support

-
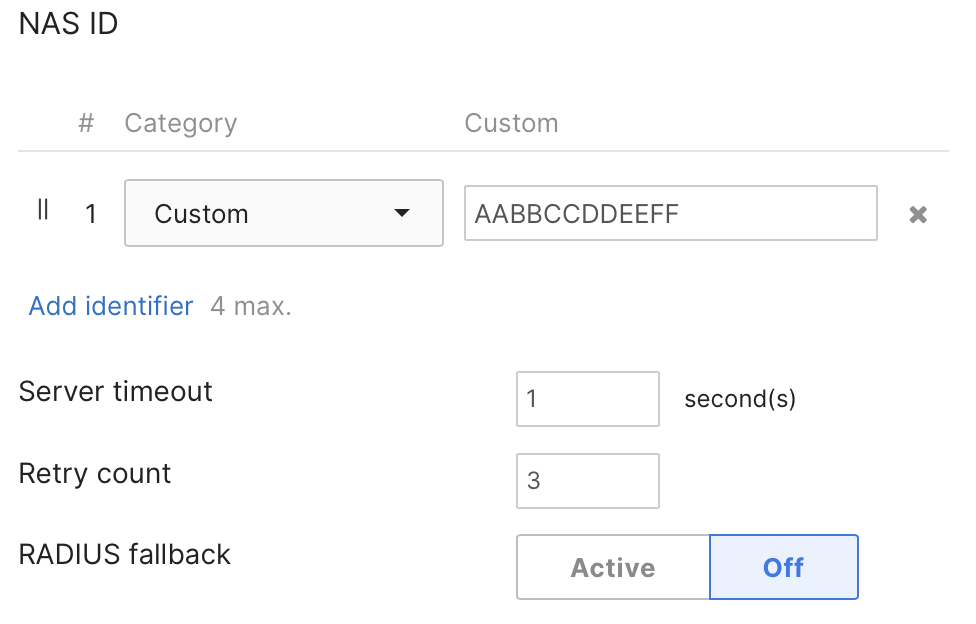
Click on the arrow to expand the Advanced RADIUS settings section
-
Change the number 1 drop down for NAS ID to Custom and enter the NAS-ID you got during onboarding
-
Click the × to remove number 2 in that list which says SSID Number
-
Click Save
Build Hotspot 2.0 Config
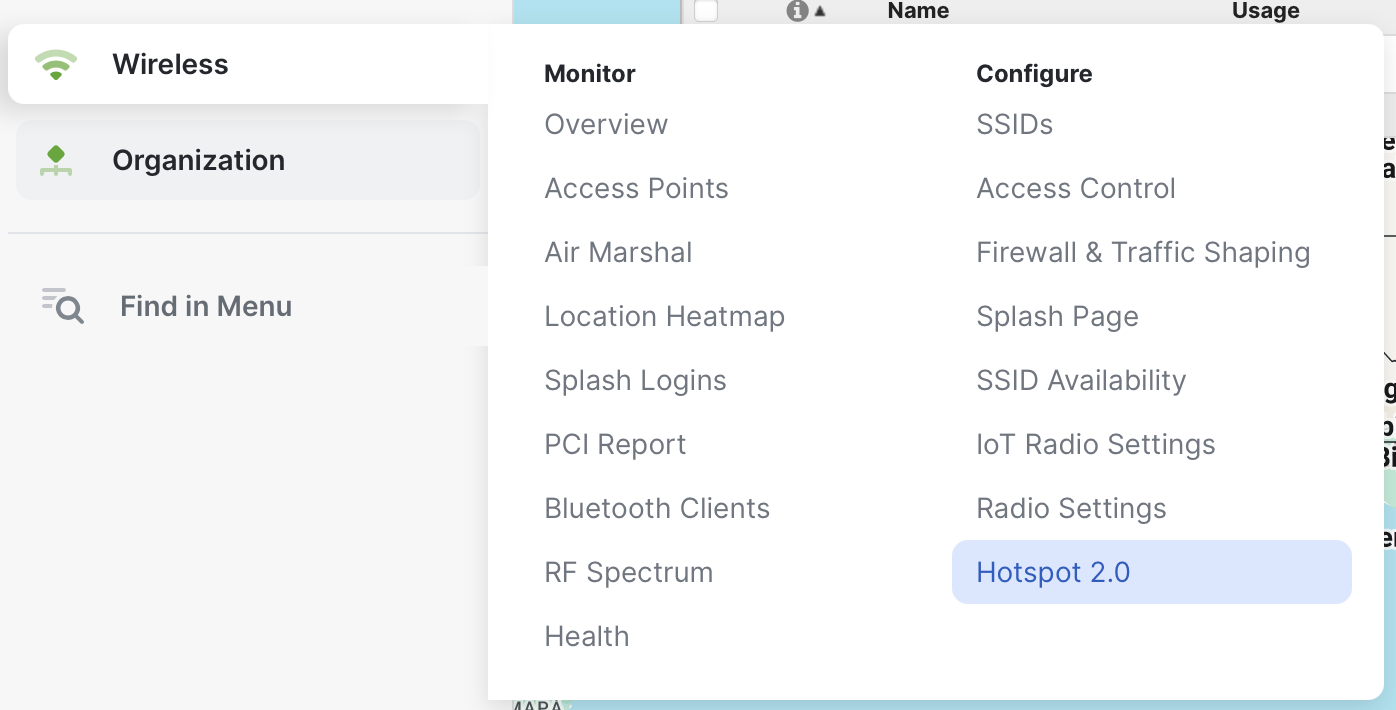
- Click on Wireless and navigate to Hotspot 2.0
- Change the toggle for Hotspot 2.0 to Enabled
- Enter Operator Name to be “Helium”
- Enter Venue Name to be the street address of your location
- Choose the best fitting Venue Type from the drop down
- Choose Chargeable public network from the drop down
- In domain list enter both FreedomFi.com and Hellohelium.com
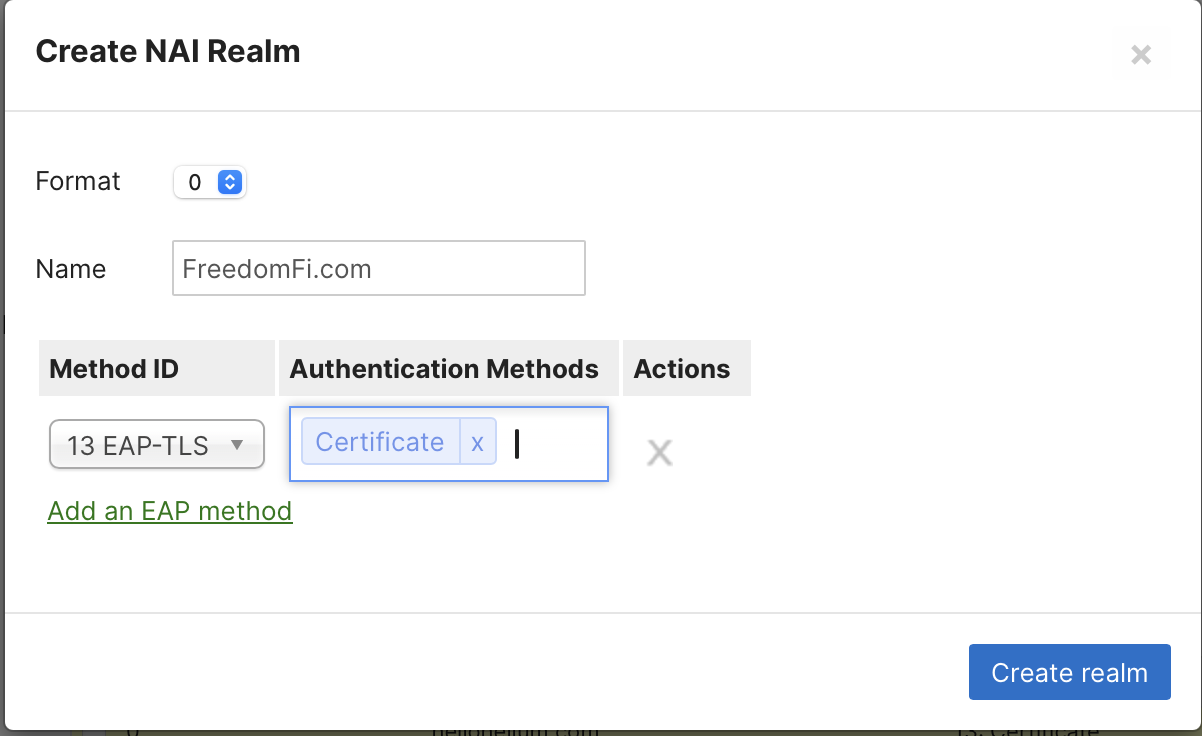
- Click Create Realm
- Enter freedomfi.com as the name
- Select Add EAP Method
- Select Method ID to be 13 EAP-TLS
- Select Authentication Methods to be Certificate
- Click Create realm
- Repeat for realm name Hellohelium.com with matching settings.
- Final Hotspot 2.0 settings should look like this:
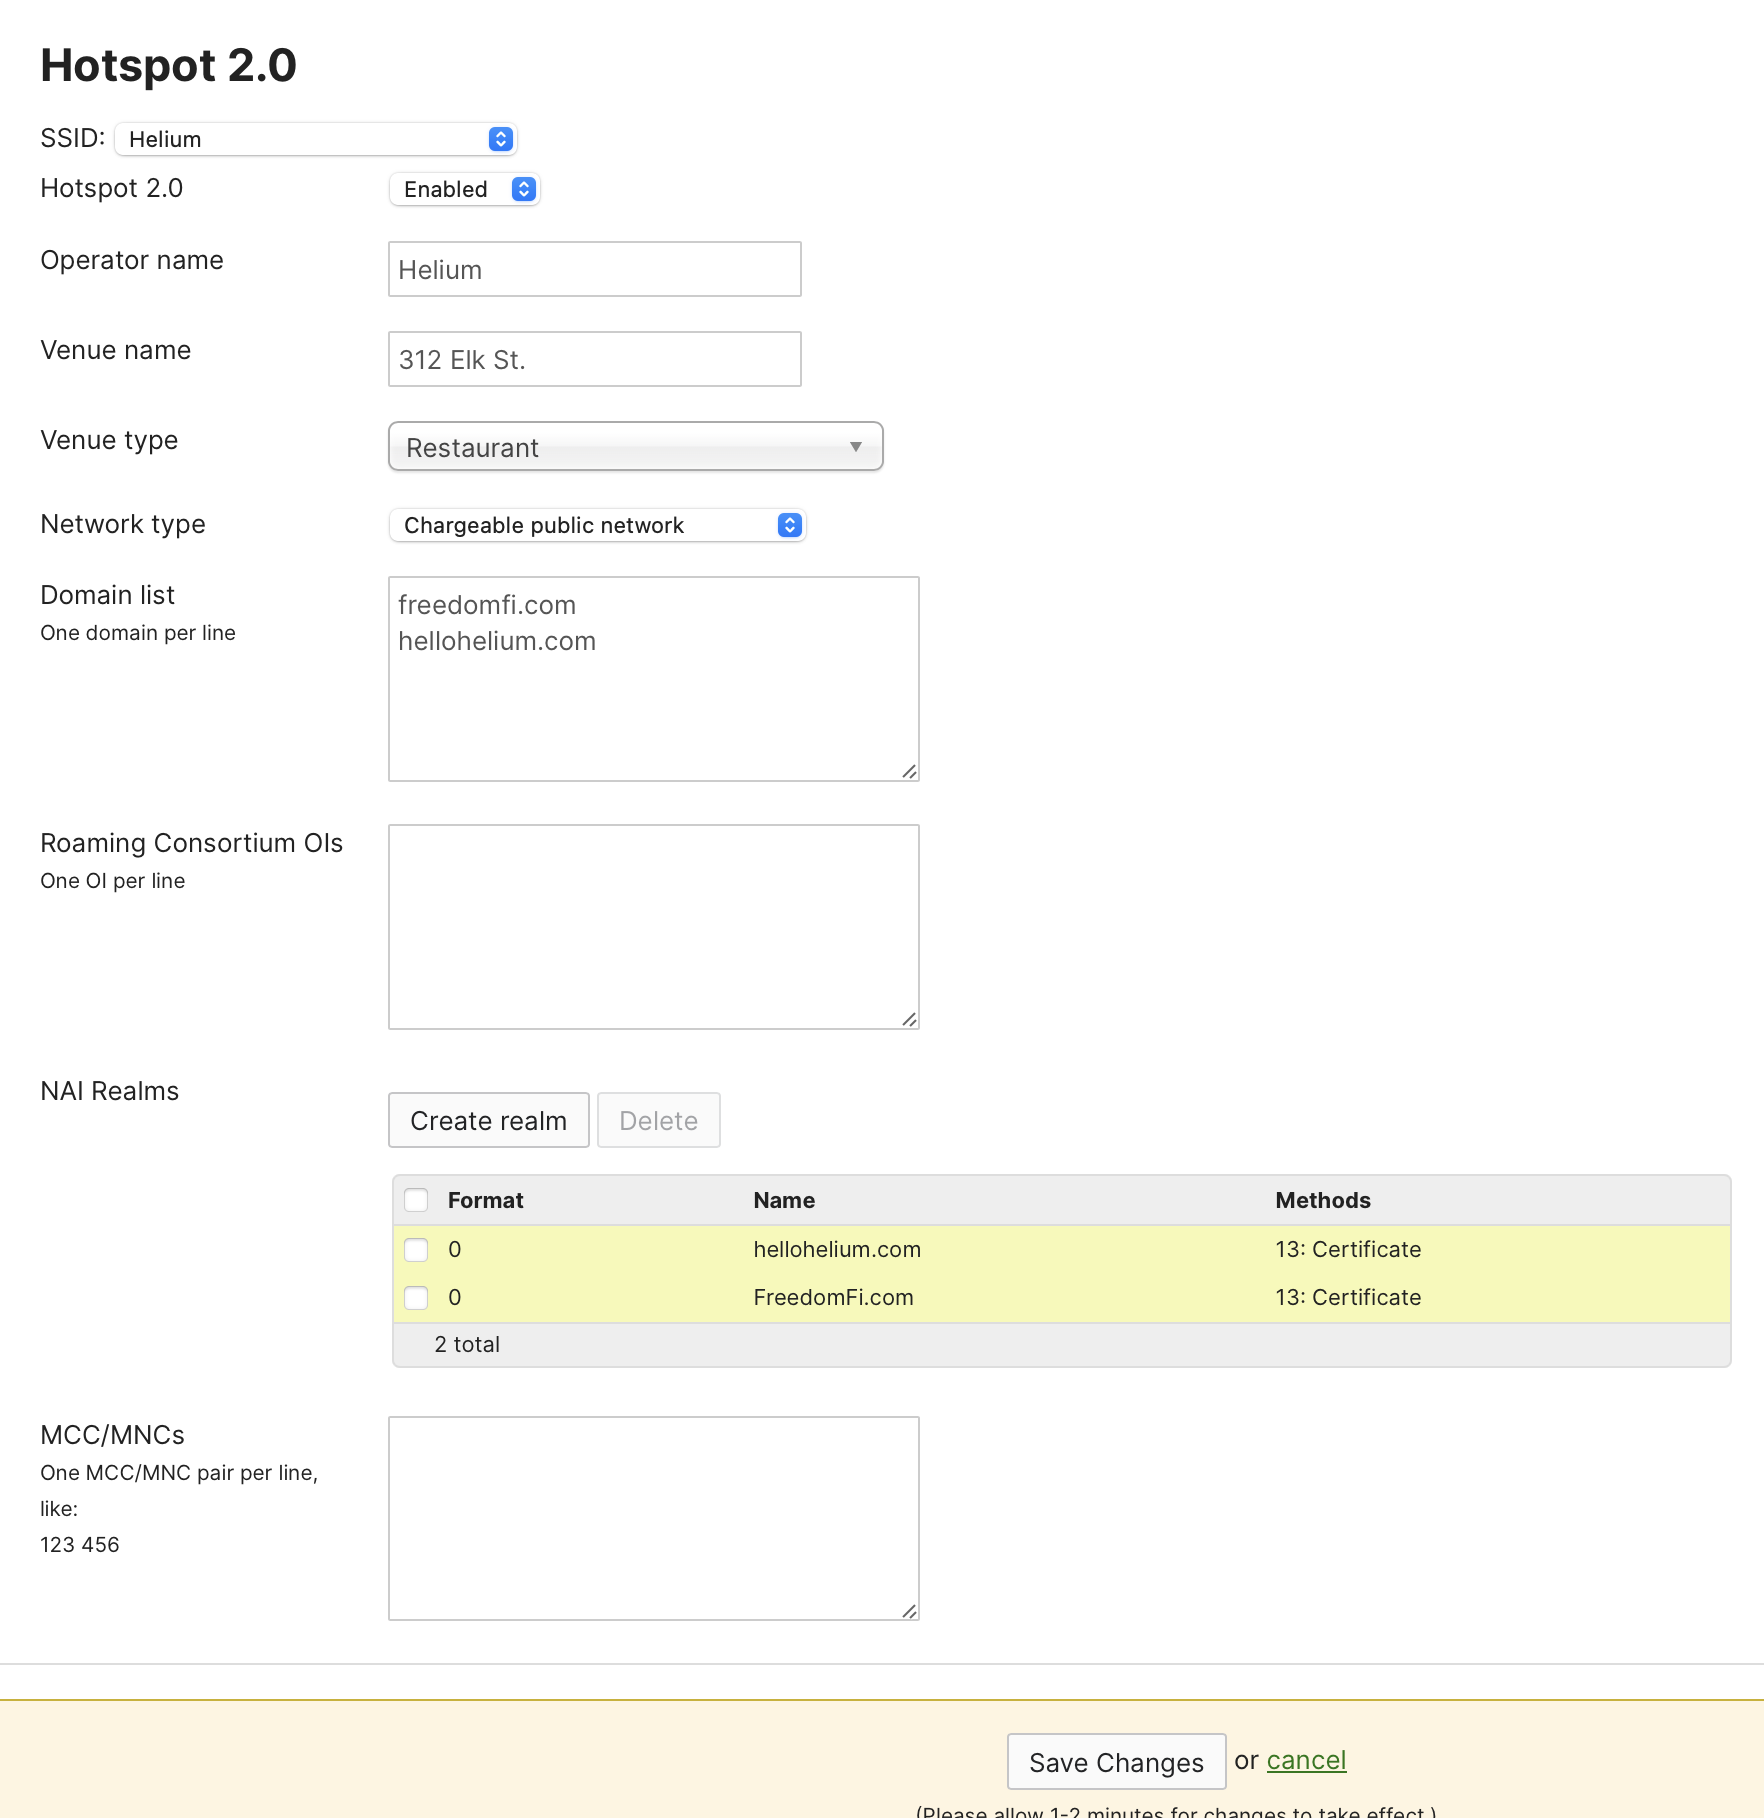
- Click Save Changes