Ubiquiti Conversion Guide
Data-Only Mobile configuration requires the Passpoint protocol. Please ensure your Ubiquiti network is using UniFi Network Controller version 8.4.54 or higher and AP firmware version 6.6.77 or AP firmware version 7.0.66 or higher, depending on hardware release track.
Obtain RadSec Certificates
Each onboarded network requires a unique NAS-ID. For Ubiquiti networks, it is recommended to use the MAC address of the network controller as the NAS-ID.
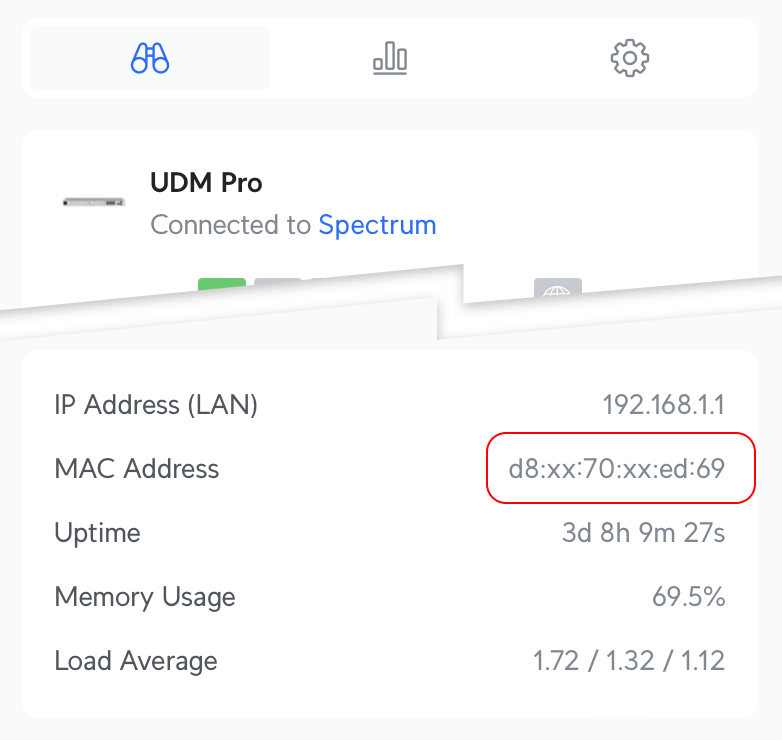
Run the UniFi network controller locally or log into the cloud UniFi Site Manager.
Navigate to UniFi Devices, choose your Network Controller and copy the MAC Address.
Use this NAS-ID in the WiFi Conversion Onboarding flow and return to this guide after the network is onboarded and certificates have been delivered.
If early access certificates were previously deployed on the network, a Ubiquiti bug may prevent new
certificates from propagating.
Restart all APs on the network after updating the certificates, and the new certificates should be
applied.
Configure UniFi Network Controller
After retrieving certificates, configuration is a two-part process: create the RADIUS profile, then apply it to a new WiFi SSID named Helium.
Create a RADIUS Profile
Configure a TLS connection to Helium Cloud AAA server (aka Radiator), which performs Authentication, Authorization, and Accounting for the end customers. Enabling RADIUS communication over TLS (RadSec) increases the level of security for authentication that is carried out across the cloud network.
In the sidebar, choose Settings, then Networks, then scroll to the bottom to Radius Servers.
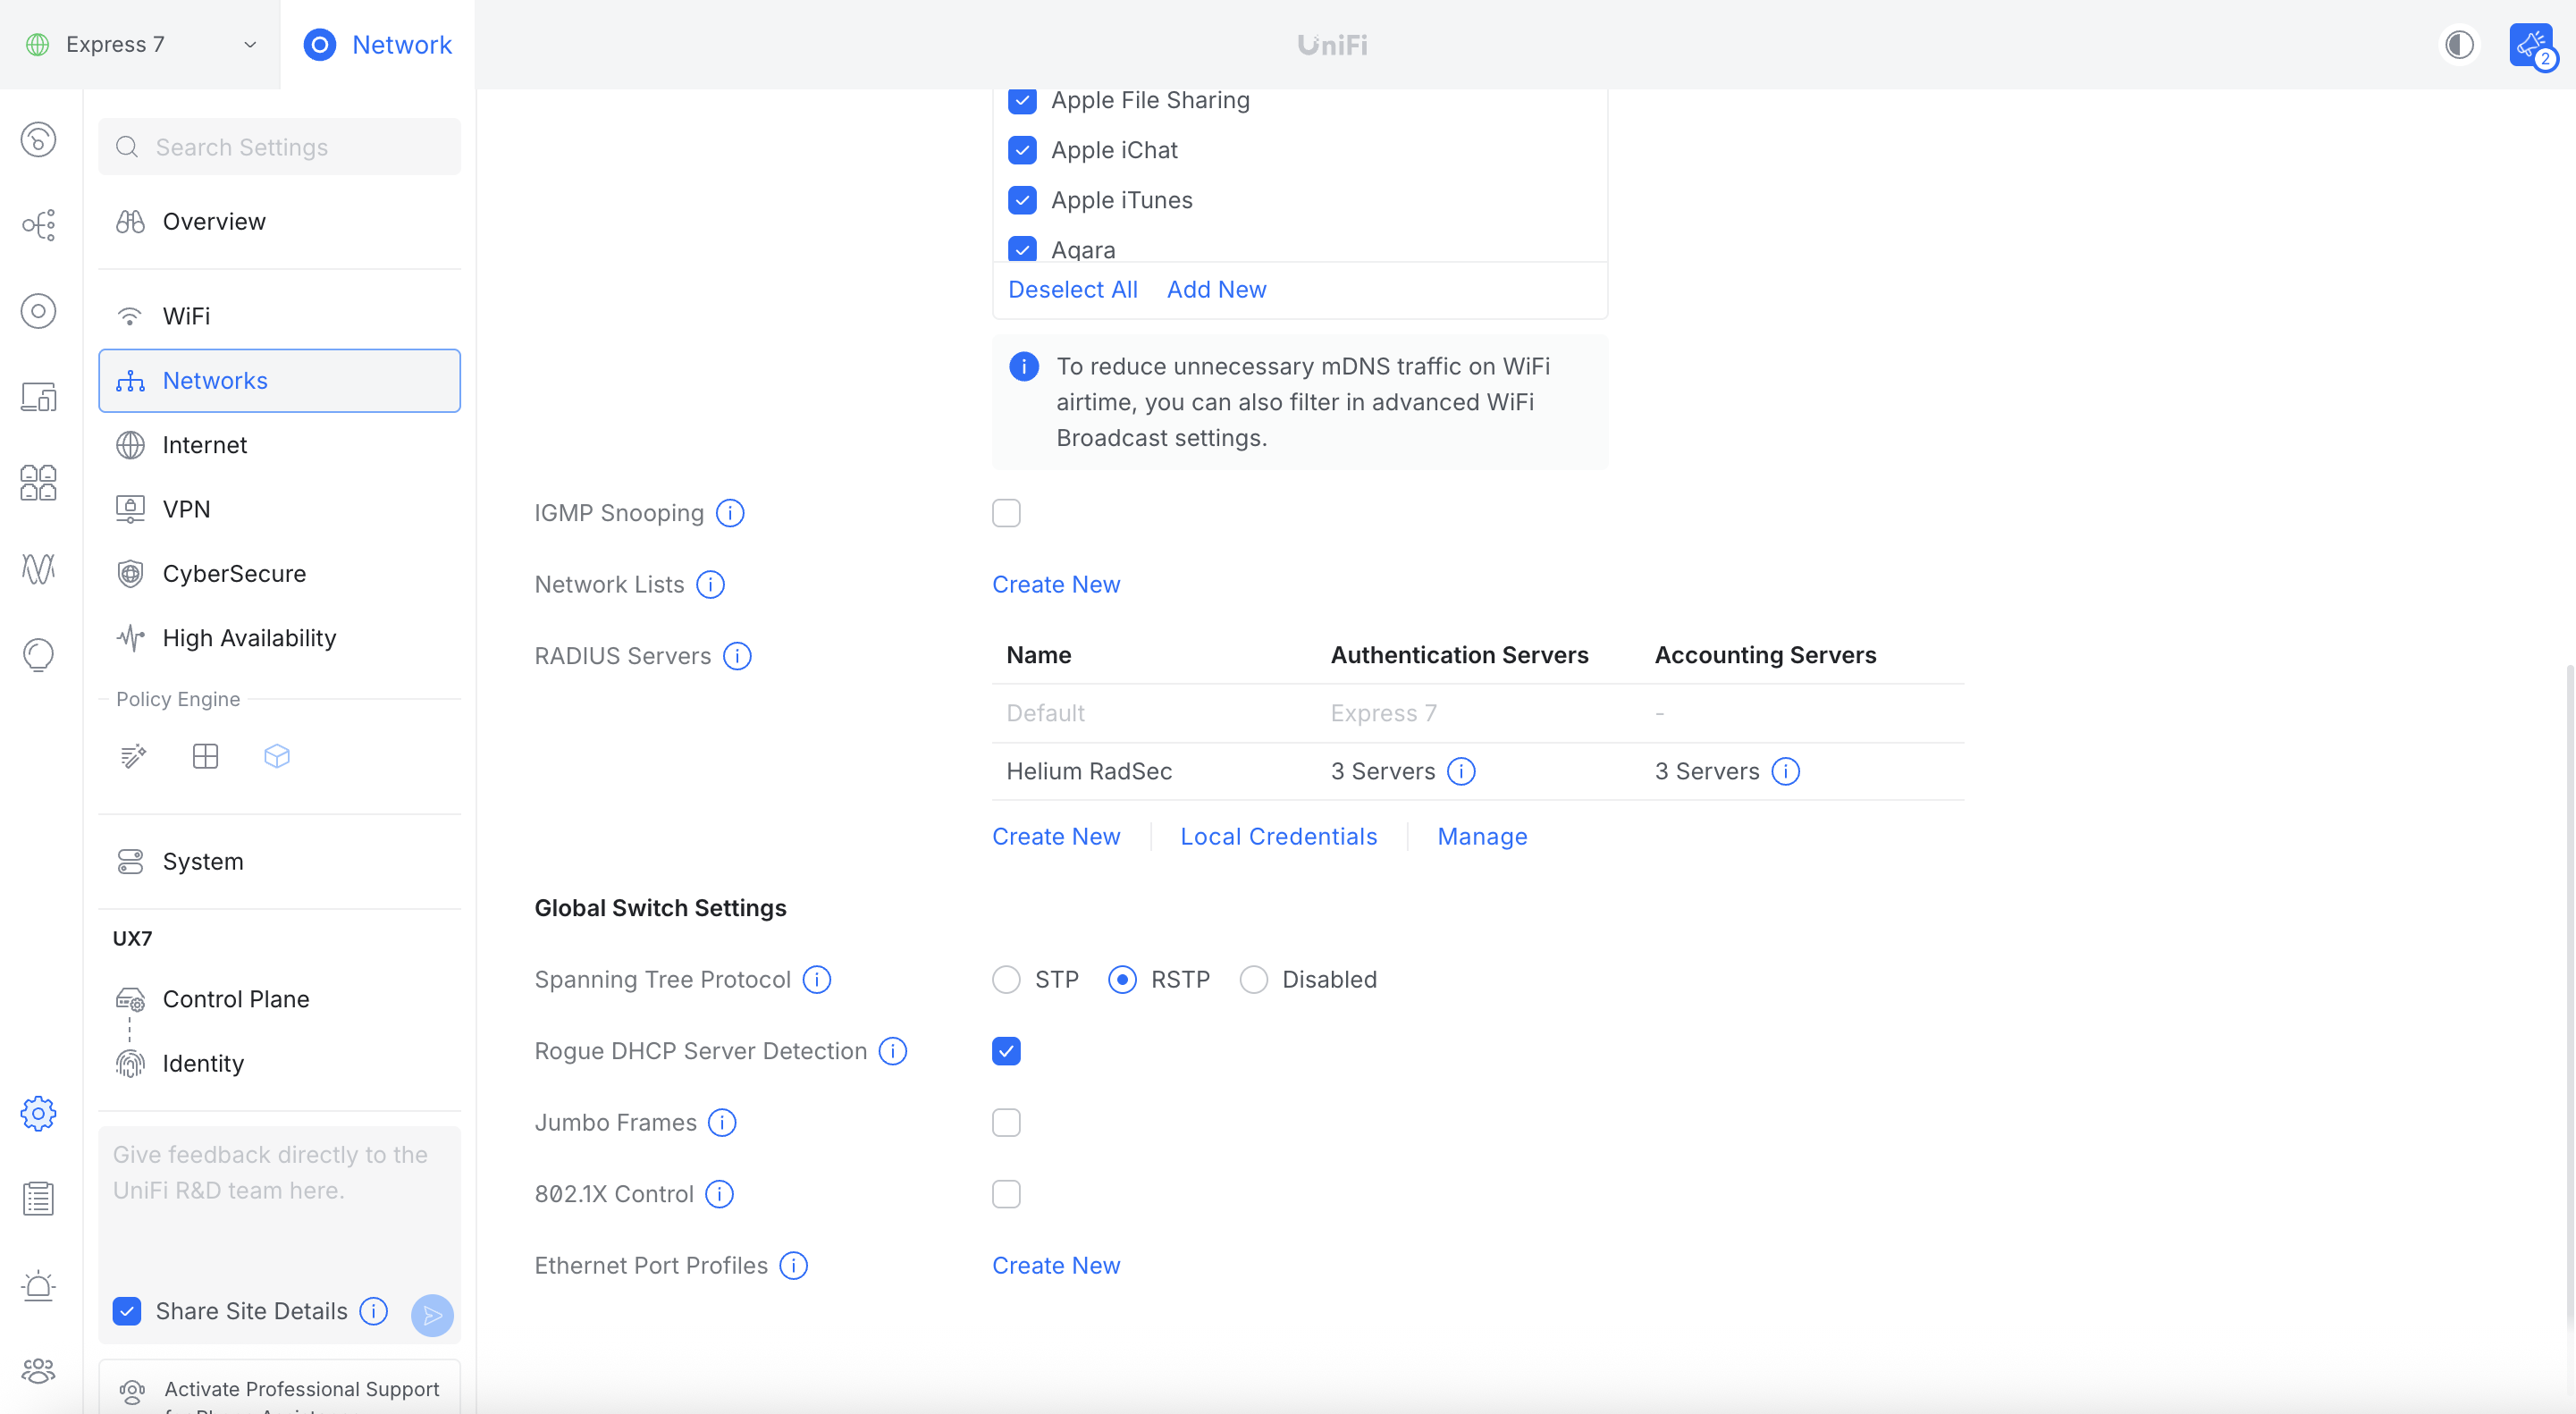
Click Create New.
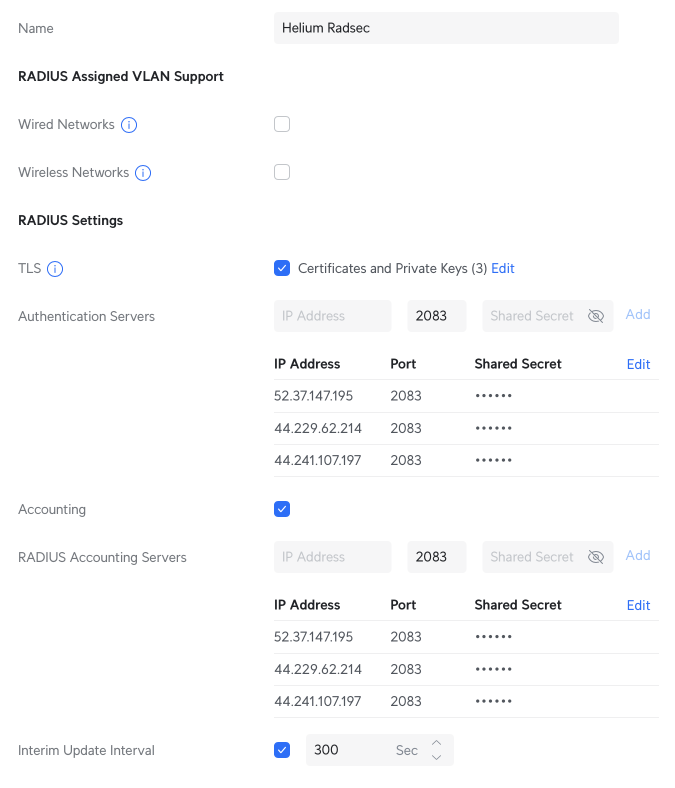
Specify a profile name, for example "Helium RadSec".
Configure RADIUS properties:
- Under Radius Settings, check the TLS box.
- Click Upload next to Client Certificate, choose the path to
cert.pem. - Click Upload next to Private Key, choose the path to
key.pem. Leave the Private Key password empty. - Click Upload next to CA Certificate, choose the path to
ca.pem.
- Click Upload next to Client Certificate, choose the path to
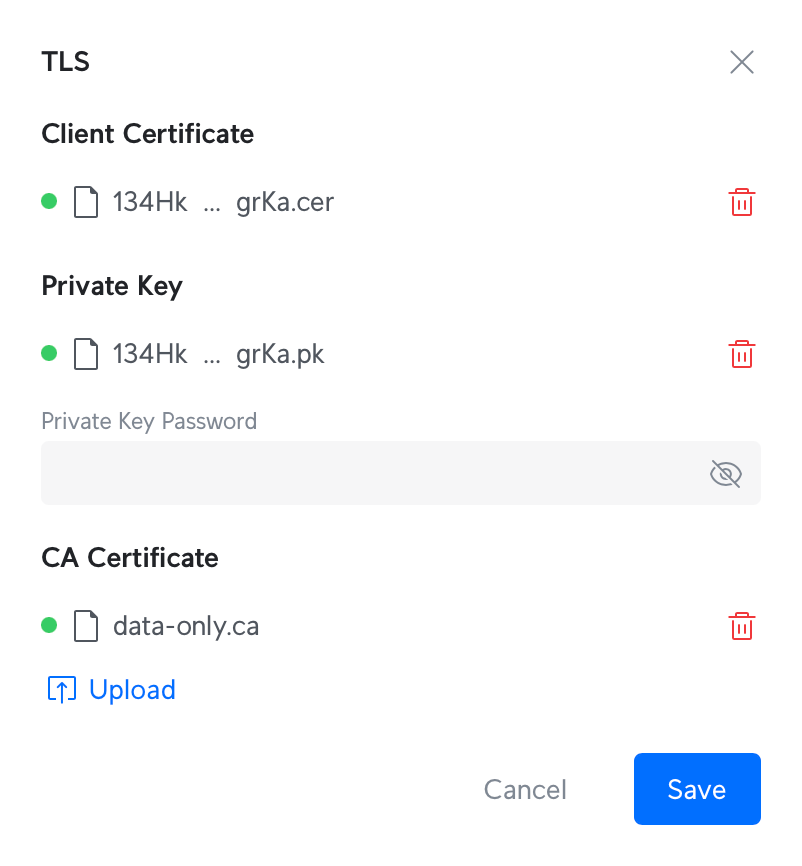
-
Specify Authentication Servers:
Add these three servers:
- Enter IP Address:
52.37.147.195Port:2083Shared Secret:radsec. Click Add. - Enter IP Address:
44.229.62.214Port:2083Shared Secret:radsec. Click Add. - Enter IP Address:
44.241.107.197Port:2083Shared Secret:radsec. Click Add.
- Enter IP Address:
-
Check the Accounting checkbox. RADIUS Accounting Server settings will appear.
If the Accounting Servers checkbox is greyed out as in the image below, create the RADIUS profile with only the Authentication Servers, save, then reopen and edit the profile to add Accounting Servers. This is a current Ubiquiti UI bug.

Accounting checkbox greyed out—workaround: save and reopen the RADIUS profile.
-
Specify the following Accounting Servers:
-
Enter IP Address:
52.37.147.195Port:2083Shared Secret:radsec. Click Add. -
Enter IP Address:
44.229.62.214Port:2083Shared Secret:radsec. Click Add. -
Enter IP Address:
44.241.107.197Port:2083Shared Secret:radsec. Click Add. -
Check Interim Update Interval box.
-
Set Interim Update Interval to 300 seconds (standard for the Helium Network).
Click Apply Changes to create the new RADIUS profile.
Create the Helium SSID
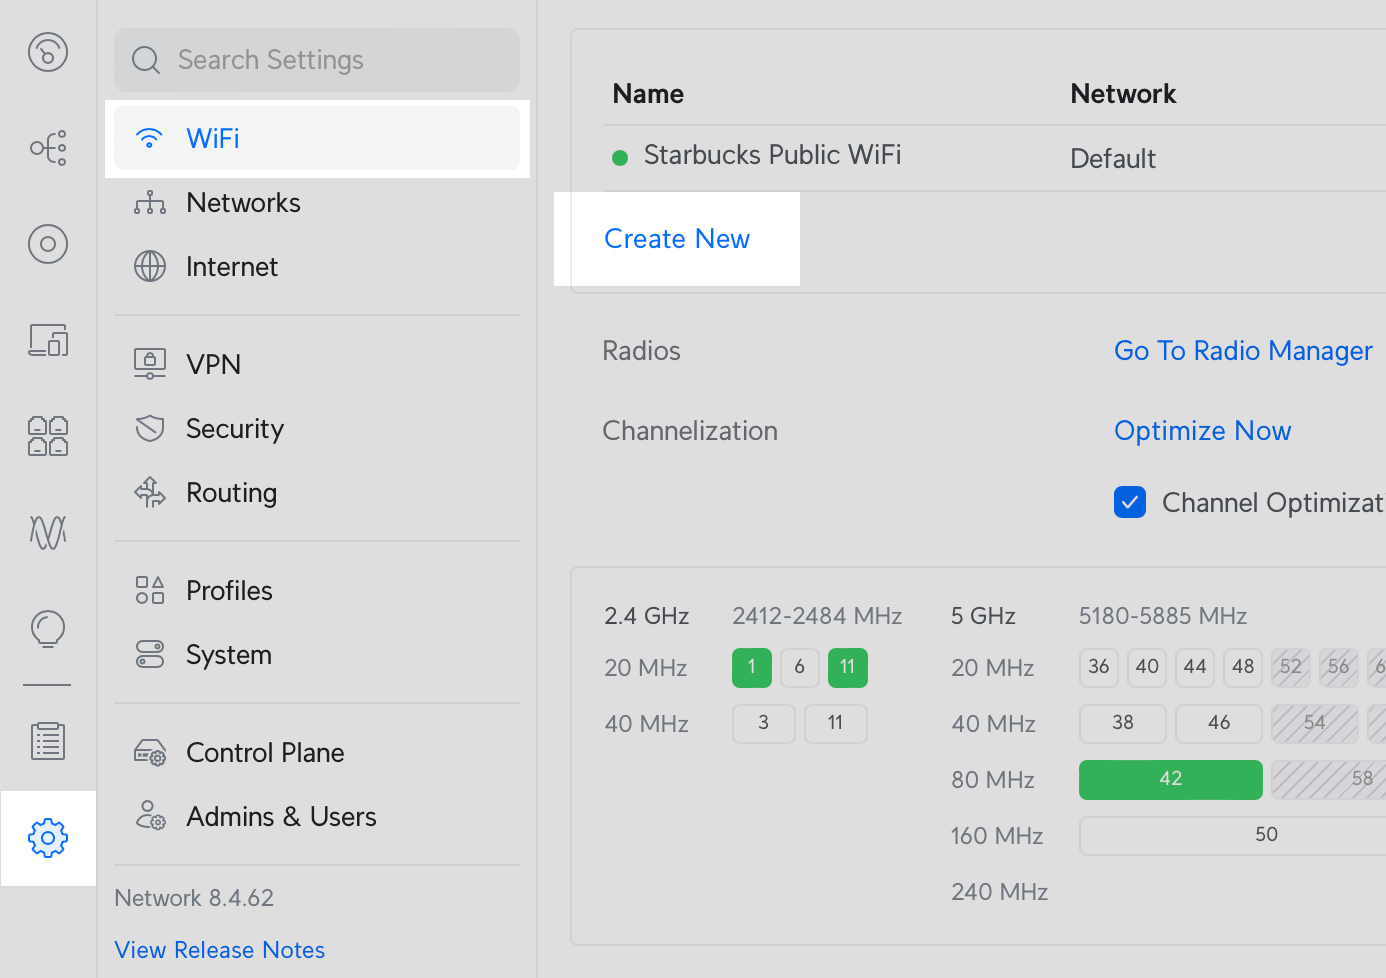
Navigate to Settings in the sidebar, choose WiFi, then click Create New
Configure settings for the new network.
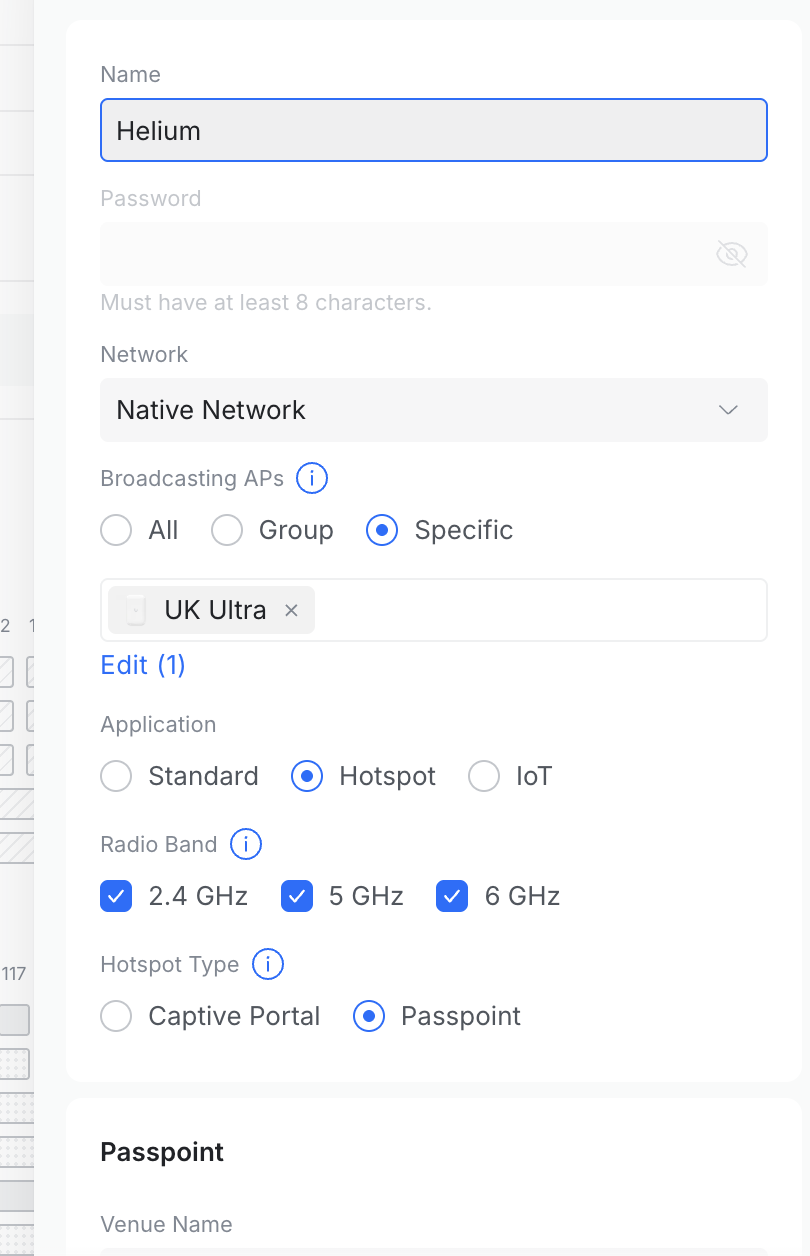
- Set the Name of the SSID to
Helium. Leave the password blank. - Under Application select Hotspot.
- Under Hotspot Type select
Passpoint. Passpoint settings will appear below. - Specify Venue Name to a name for your site.
- Specify Venue Type with the option that best matches your site.
- Set Network Type to
Chargeable Public Network - Set IP Address Type Availability:
- IPv4 to
Double NATed private IPv4. - IPv6 to
Unavailable
- IPv4 to
- Add NAI Realms with the following two entries:
- Name:
freedomfi.comEAP Method:EAP-TLSSub-Methods:Certificate. - Name:
hellohelium.comEAP Method:EAP-TLSSub-Methods:Certificate.
- Name:
- In Domain List, add
freedomfi.com(or your home domain if applicable). Click Add.
-
Set Security Protocol to:
WPA3 Enterprise -
Choose External RADIUS Profile: Helium RadSec.
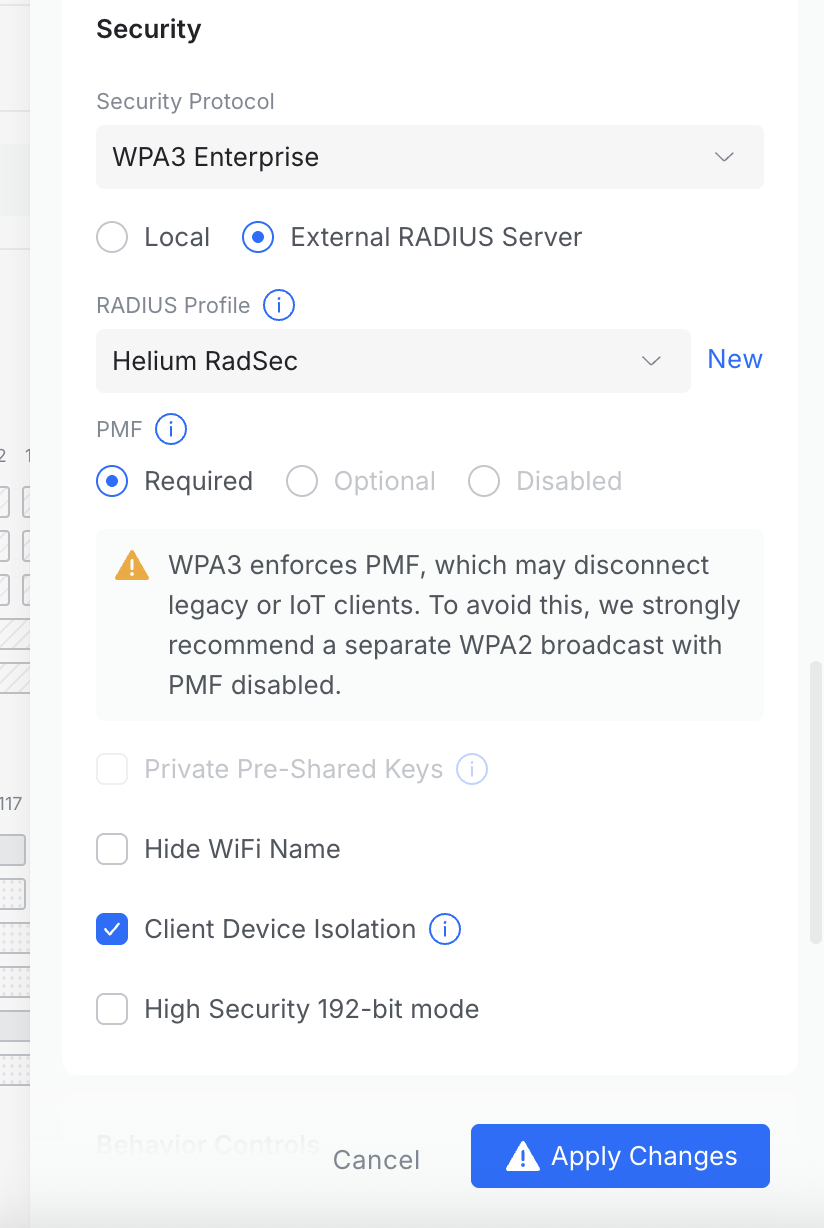
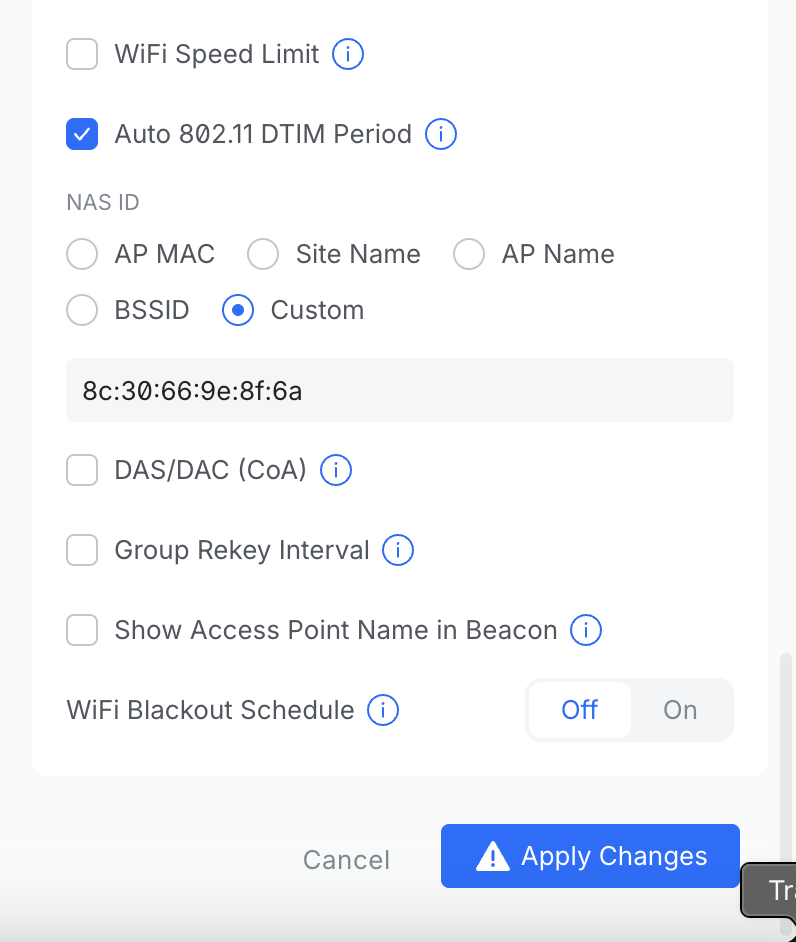
- Under NAS ID Enter the NAS-ID used during Helium onboarding in the Custom field of NAS-ID.
- Ensure Client Device Isolation is checked for secure networking. See the Ubiquiti guide on network and client isolation for more information.
Click Add WiFi Network.
Your Helium SSID is now configured. To verify, forget the existing network on your device and connect to the new network with a device that has a supported carrier, such as Helium Mobile.